Showing posts with label precious metal clay. Show all posts

Sunday, May 15, 2011

The birch season has started!

There is a period in early spring where I keep glancing at birch trees. The time in which they go from having an almost indiscernible green hue to having fully developed leaves is very short. You have to be there at just the right time and pick the leaves when they're the prettiest. This year was extra hard since we had unbelievable hot weather at the end of April. I spent one Friday picking about 40 leaves and painting them with Precious Metal Clay paste. After that first layer they are preserved, and I can use them later on.

Look at the pattern on those leaves. Beautiful!

Rows of leaves like cookies on a baking sheet
And the finished result - a fired birch leaf on a silver ring:
I just listed this ring in my shop and any sizes can now be ordered. Happy spring!

Wednesday, April 20, 2011

Artist feature: Joy Tan

One of her more elaborate
designs.
I haven't featured any artists before (other than me, haha) so this is a first. Joy featured one of my items on her blog, somebody spotted it, and I want to use this feature to thank Joy for the sale I got through her. That and I really love her work. She is located in Singapore and is a woman of many talents - she does both painting and jewelry making. She works with metal clay, just like me.


How and when did you start making jewelry?
Haha, my start was in fact not special at all. I was trained as a Fine Arts Artist so making jewelry never came into my mind and I am someone who like to see the sparkles of the jewelry instead of wearing them. About 2 years ago, a friend from England introduced me to Etsy. I was very excited and impressed by the handmade spirit I had seen in that website until I spent hours and nights amazed by the handmade items. After further considerations, I started to borrow related books from the library and bought some materials to make some simple earrings and bracelets. 
An example of Joy's dainty flower
pendants, a dandelion

What do you like best in the jewelry making process?
I enjoyed the process in creating delicate details when making art clay silver pendants. I love the quiet and peaceful moments that I am experiencing during it. I never really attends any jewelry lesson, so creating something new with art clay silver on my own contributes to much achievements and satisfactions.
What inspires you?
God's nature is my very first mean of inspirations. Etsy is a really good place for ideas and references. Joining the Aspiring Metalsmith Team in Etsy really helps me a lot as many of the hardcore metalsmiths there are very very knowledgeable with torches, metals, hammer and many other materials I never know....haha....and mostly gratefully, they are very friendly to share related information. 


Joy has been experimenting with
adding dyed concrete to her designs.
I love the result!
What are the advantages and challenges of having a handmade jewelry business in your location?
What I have created is considered something new and rare in Singapore as the local people have little knowledge of art clay silver, so I will just need more efforts to start this market. On the other hand, due to the great focus on mass production in this country, people are rather focused more on branded items and icons. Little appreciation is given to handmade items as they are not so educated with the efforts that a artisan spends in creating something and resources are limited here too.


How does a design come to you?
I have the habit of looking at any creations around me even if it is small and I will sketch on my small note book with things that are interesting. I will try to depict the idea in different compositions then I'll choose the best one. Sometimes, I will just make the jewelry instinctively. 


Thank you Joy! Those of you who would like to see more of her beautiful jewelry, make sure to check out her Etsy shop.

Saturday, March 19, 2011

Thing a Week- Weeks 10-12

I'm getting worse. Now I'm writing one blog post about three entries for my 2011 Thing a Week challenge. Oh well. One blog post is better than none!

So, my week 10 items is a little different in that it's a PMC item. PMC is Precious Metal Clay, and this is the material that made me a jewelry-making-holic. The reason why I haven't had many PMC items in my Thing a Week challenges is that I mostly use PMC in non-challenging ways. If you're too broad with the techniques you use, and you don't have all the time in the world, you have to pick and choose which technique you want to dive deeper into and which technique you want to maintain but not refine. Currently I'm not refining my PMC technique too much, but I got a request for an orchid pendant. Luckily I have two flowering orchids at the moment and I asked one of them if I could have a flower. I interpreted the answer as 'yes, but only if I get nutrition in my water every week while I flower instead of once every two weeks'. Okay, deal! I dissected the flower and used every part to make a silver orchid flower. This is the result:

Week 11 is this ring:
My inspiration for this ring was a beautiful Art Nouveau opal ring, with platinum leaves framing the stone, and tiny diamonds set into the leaves. I have no idea how to even attempt something like that, and the ring I saw may have been cast, but I loved that the leaves formed the setting of the stone. This is my first attempt at such a design, and it's not entirely like what I had in mind, but I will definitely explore this again. I have listed it on Etsy and called it the 'sunny garden ring'. The stone is a beautiful red brown sunstone with multicolored glitters that sparkle in the sun.

Week 12 is a ring with a raw tourmaline crystal. I set it between two H-shaped pieces of silver and folded the corners over. Steady like a rock :) 
The back plate is a piece of reticulated silver I made a while back. For the longest time I didn't really know what I wanted to do with it, so it was on my bench along with a lot of other small pieces of silver. But then I got the tourmaline and it looked rather nice on top of the reticulated silver. 

I love how the stone looks with the sun shining on it!

That's all for now. I have no idea what my next creation will be. :)

Monday, March 7, 2011

Thing a Week- 8 and 9

For these Things a Week I have actually stepped out of my comfort zone. It's not always easy to do so. Like with everything, you need time, a healthy dose of optimism, and a certain disregard for things that can go wrong (especially with the silver price being as high as it is).

Week #8:

These filigree moonstone earrings are made with traditional filigree patterns and thin twisted filigree wire. Making filigree is tricky because of the thin wire and the many soldering points - always a risk for melting. Time will tell if these were a result of beginner's luck or if I have finally learned to control my torch a little.

Week #9:


This little hedgehog has been sculpted in metal clay. I don't sculpt much, but I'd like to do more of it, especially with results like these. I made the sterling silver band of the ring in a wavy pattern, to symbolize the erratic way animals sometimes walk when following  their noses. This little hedgehog will soon appear in my Etsy shop.

Monday, November 8, 2010

My work space

The time has come to show you my work space. I haven't felt like doing so before, for a few reasons. My bench is never tidy. I do actually vacuum around my workspace and on the floor (bye bye bits of solder and tiny gemstones I always drop on the floor) but I tend to avoid my bench. There are usually tons of tiny things lying around there in a weird organized chaos, and doing anything there - cleaning-wise - is something that disrupts the organized chaos. But then my team, the Aspiring Metalsmiths, came with the idea of doing coordinated blog posts, the first one of which is due now. Funnily enough I was the one who suggested that it would be 'show us your workspace'.

So no, I haven't felt like showing my work space, and the second reason is that it's not all that impressive. I have a metalsmithing class every week, and I wish I could just take a picture in their studio and pretend it was my bench. Every inch of free space is filled with tools, tools, tools, silver dust and half finished creations. I would like my work space to look creative like that. Instead I mostly feel like it's dirty and messy.

But, no dilly-dallying. The time has come.  This is my house, and you can see that it isn't big. It's nice, but not big. Behind that window on the first floor is my work space. It's not perfect: it's dark, there is no water and well, there is the slanting roof. But it's better than the kitchen table and I can just leave my stuff everywhere. ;-)

Here is my work space:
'Scuse the fish eye view but it's the easiest way of showing most things. Since I work with metal clay and silver sheet I alternate between work surfaces. I have a plastic surface I cover my table with when I work with metal clay. On my desk you see some playing cards where it says 'metal clay' and that's where I keep my metal clay items in progress. It happens that my cats walk over my bench and I come back to some crumbles, but I haven't figured out how I can keep them off the bench so I'll have to live with that. So I basically have everything on one table with some tools, wire, cabs, etc in drawers surrounding the area.
The flexshaft bit and file holder on the left is actually a repurposed pipette tip holder from my work. We just throw them away but they are great for these tool bits. I don't even remember what I had before these.

Of course you can also just take a piece of wood and drill some holes in it but this is my solution for now.

I have already shown my kiln but since it's part of my work area I should show it again:

There it is, on four ceramic tiles. Behind it you can see the cupboard with all my receipts and all my stuff for shipping.

I also store my entire essential oil collection there, which I use to make soaps and balms for my other shop, GreenLivingSoap. I won't show you the corner where I keep big bottles of vegetable oils, soap molds, glass bottles, lip balm containers, waxes, etc in cardboard boxes. It's behind my back from where I stand when I take this picture.

When we're allowed to extend our house the plan is to make a real room of this floor, with more cupboard space, and hopefully water. Although the walks up and down the stairs must be good for me in some way.

So this is it for now, my tidy bench (didn't dare to show the before photo, which I'm sure I deleted) and surrounding area.

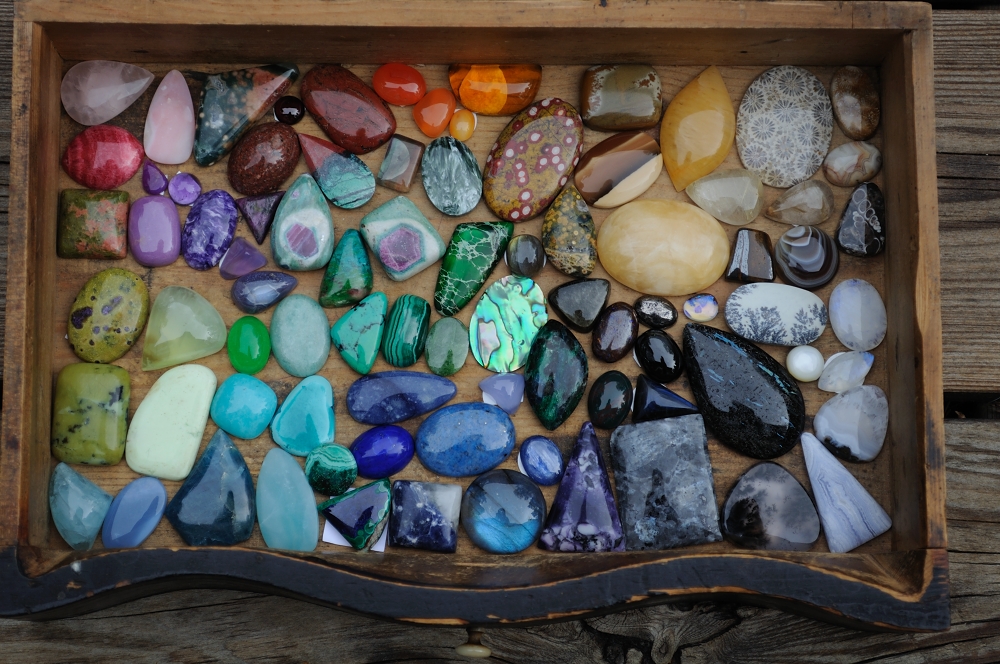
And finally, a hobby is such a good excuse for buying all sorts of these (not that I bought the Rio Grande catalog, it's just in the same pile):

This blog post was part of a team effort, and please check out similar posts by my Aspiring Metalsmiths teammies:

Jessica Lopour - http://www.abellablue.com/blog
Jeanne Millman, Golden Water Creations http://www.goldenwatercreations.blogspot.com/
Sylvia Anderson www.SylviaAnderson.blogspot.com
Steph Stargell Designs http://stephstargell.com
Clarity, Scrollwork Designs, www.thesquarepegnation.blogspot.com
Brandy, The Frogs Pond http://thefrogspond.wordpress.com/
All Wired Up Jewelry Designs http://allwiredupjewelrydesigns.blogspot.com/
Lisa Rippingale Robertson http://sandytoesjewelry.blogspot.com/
Heather, Misty Ridge Designs http://mistyridgedesigns.blogspot.com/
Joy http://joypeckjoy.blogspot.com/
Nancy Creations - http://nancysjewelrydesigns.blogspot.com/
Carole Axium http://www.caroleaxiumdesigns.com/journal/


Or see the list of blogs here.

Monday, October 25, 2010

I feel so productive!

I tested my kiln this weekend. Granted, I mostly refired items I had already fired, but it was really easy to program and when it was heating up I sat there working on other things with a bunch of rings, earrings and a pendant in the kiln. Such a nice feeling.

Here it is, all plugged in and ready to go. I have a Prometheus medium sized kiln, with an inner chamber of about 20 cm width. The lid lifts up and when firing it is down but not locked. It hardly releases any heat, despite the loose door and the peephole in the front. So far my cats have shown no interest in the kiln, but eventually after restructuring my work space, I may want to put it higher up somewhere. I don't want to risk any burnt cat paws.

A ceramic tile/shelf came with the kiln, and since I had no sensitive items I put everything directly on the shelf and fired at 800C for 30 minutes. All of the metal clay I had in the kiln was PMC3, which fires at relatively low temperatures.

This is what the items looked like after they came out of the kiln:

And after an hour or so in the tumbler:

:) Yay! I'm already happy with it. :)

Thursday, October 14, 2010

Buns in the oven

Well, not yet. No matter how you interpret the title, it's not true. But I have taken the leap. A big step for me and my bank account. I have purchased...

... a kiln.

<- this one!

:)

It's true! Within (hopefully) a few days I will have a brand new kiln that will open up new worlds for me. With it I can fire more types of metal clay, I can make larger objects, hollow objects, I can enamel, fuse glass, and even make small ceramics things! Had it been any cheaper, I would have bought it a long time ago. On the other hand, it's an investment, right? That is always a good thing to say when you really want to buy something. And that is exactly my reasoning when I indulge in the most costly sin I currently have: stone buying. I figure, can't go wrong with stones, right? They don't lose value, they last forever. The only risk there is is that I accumulate so many that I will either forget about half of them or never find them in my badly organized piles and boxes of stones.

So I organized some of my stones:


See, that looks nice! The shameful part is that this is not nearly my entire collection. Ahem.

I put myself on a stone diet that lasted from the middle of June to the beginning of September. During that time I did very well, but afterwards I was right back where I started. Sometimes I feel like an addict!


Here are some of my more recent purchases:

Lovely lavender burro creek jasper from
Etsy seller CabochonDesigner

Pink and green drusy cabochon from
Etsy seller StoneTemple
A wonderful gold calico lace cabochon from
Etsy seller cabbingrough

Aren't they great? Now I'll just have to make something with them and the multiple other beauties I have lying around..

Thursday, August 26, 2010

Rubus chamaemorus, I finally found you!

Rubus chamaemorus, or more popularly called cloudberry, is something I love but until a week ago, I had never seen it in the wild. It is a funny little berry. It grows in the arctic tundra in marshland, every plant produces one berry that has the shape of a raspberry, is red when unripe and then golden when ripe. And it is delicious. 


You can buy cloudberry jam and frozen cloudberries in the grocery store here in Sweden. You do not have to go out there and face wild deep marshes, get water in your boots, get a thousand mosquito bites, all for a few lousy berries. At least, that's what I thought you had to do. I have been in the Swedish mountains before but I had never seen any cloudberries anywhere. This made me feel that they only grew in highly inaccessible places, which confirmed my earlier idea about what needed to be faced in order to get to them.


But last week everything changed! Boyfriend and I were hiking on a trail leading into the mountains. We passed the tree barrier, and the landscape is just amazing there. Swedish mountains are soft and shaped by the glaciers of the last ice age (see photo, doesn't it look amazing?). 


There are actually trees there but they aren't higher than a few inches above the ground. And while the piece of trail I'm standing on in the photo looks pretty dry it can be the complete opposite: the trail going straight through wetlands, marshes and streams.


So we were following our trail, sometimes wet and sometimes dry and I always make sure I look a lot towards the ground, mostly because I want to see where I'm walking, but also because I'm a biologist and plants and flowers interest me. 


We are crossing a stretch of peaty marsh, with a lot of moss and not as much grass as in some other wet places. And then I see it. Something orange-y yellow, out of the corner of my eye. And I shout at Boyfriend: 'Hjortron!' which is Swedish for cloudberry (pronunciation yoortronn).


There they were! I couldn't believe it! It was sunny and warm. It was wet on the ground, but not boot-sinking-away wet. There were No Mosquitoes. They were very pickable; no impossible obstacles that needed to be conquered.


I took my silicone mold making stuff out of my backpack (a real metal clayer never goes anywhere without his or her mold making tools) and I picked the nicest little cloudberry leaf I could find and made a mold out of it with a random flat rock for support. 


I carried the mold on the stone in my hand until I was sure it was firm and then it lived in a compartment of my backpack until I was back home in Stockholm. And this is what I made with it a few days ago:


A cloudberry ring in sterling silver with a leaf made with metal clay from my mold, and a rose cut carnelian as a cloudberry. I'm very happy with it and now you may understand why! :)


The ring will be available in my Etsy shop and can be made in different sizes.

Saturday, August 14, 2010

Making a leaf ring with Precious Metal Clay

This is my first tutorial, or show and tell. I hope that it may inspire metal clay novices to finally take the step and try it out, that interested customers may see how I make things, or that my metal clay and silversmithing friends can see how I work and how messy my bench is. I only show a fraction of it so you don't Really know how messy it is. 


So this tutorial is for making a leaf ring. You can actually use it for any texture because the principle is the same. This is a relatively easy ring in a way because I have a part that folds over another part; on the other hand, you have to be careful that you don't leave any marks so you keep the texture of the leaf and not that of your fingers. ;)


Before I pick my leaf, I bring everything I need out:
I have my metal clay (I use PMC3, a matter of taste and what brand you are used to), badger balm, a plexiglass roller, PMC3 paste and playing cards. For this particular ring I'm going to roll out my clay three cards thick.


I have a glass plate on my bench but I find the clay sticks more to the glass than to plastic folders, so I actually always use this kind of plastic folder as a surface. It's very non-stick and easy to work with. When I'm done I let the small pieces of clay dry and brush them into my water jar later on.


I now go down to the garden and pick a suitable leaf. I then cut off a piece of clay (you learn to estimate the amount you need, but usually I take a little too much and then end up doing smaller spontaneous projects with some of the leftover clay). Put some badger balm on the surface between the playing cards. I use an old toothbrush for this.


Note that I have a ring mandrel on two supporting blobs with a piece of paper around where I want to make my ring. This ring paper is sized and you can buy it at metal clay suppliers. I made the supports myself from two component silicon mold making stuff, also available at any metal clay supplier.


As you can see in the photo on the right I now have my leaf and I have started rolling out the clay.


When I have rolled out the clay to the height of the three cards, I put the leaf on top and roll to make a texture. 


I then cut out the leaf shape with a needle tool or scalpel and store the leftover clay under the lid of my badger balm (wet the inside of the lid with water using a brush). If you leave it out in the open it will dry out quickly.


So far so easy. Now it is time to put the clay on the mandrel and make a ring:


Glue the two ends together with PMC paste (also called slip). Make sure you press gently on the connecting parts, for a few seconds at least. If the connection is too weak the two ends will slowly come apart, and you risk coming back to a deformed ring.


Let it dry. I usually let it dry overnight to make sure it really is dry.


Then comes the sanding. I use flexible foam type sanding pads like in the first photo, my Dremel with diamond files or - as shown in the photo to the left, ceramic files in different shapes. I also use diamond needle files. When I want to get a really smooth finish in an area that just needs to be smooth I sometimes use a piece of toilet paper moistened in water and squeezed out.
 I collect my silver clay dust on a piece of paper with a fold in the middle, as shown in the photos. When I'm done sanding I pour the dust into my water jar and make my own slip with it later on. No waste!


When I'm done sanding it's time to fire. I have a Microtorch (creme brulee type kitchen torch) I use to fire metal clay. I feel it gives the right type of heat and there is no risk for overheating if you're careful. I fire my pieces for 2.5 minutes, unless it's a bigger piece, then I choose to fire it for 5 minutes. I have never had a piece that hasn't sintered completely using this clay though.


When you first direct your flame towards the piece it will start burning. This is the binder of the metal clay burning away. Keep going until the piece gets and orangey tone, as shown in the second photo. It can be hard to see in daylight so you may want to draw the curtains. Start your timer set on 2.5 minutes from the point that your piece has this orangey glow.
If you see a metallic shine, pull back your torch right away. You have now melted some of the surface. Your piece may still be okay so keep on firing and move the flame around. I usually keep my torch at a 45 degree angle and make slow circular movements across my piece.

When you're done firing you can quench your item in water or let it cool down on the firing block. Then I just throw it into my tumbler and let it go for an hour or two. 

And this is the result:


Depending on what I feel like I either patina my ring with Liver of Sulfur, or I leave it as it is. I love the frosty whiteness of the areas that the steel shot in my tumbler can't polish.


Thanks for looking!

Giveaway pendant finished!

I have been working like crazy to get the pendant done before I'm off on a trip to the Swedish mountains. It's not vital that it gets done before that, it's more that it feels good to have it finished and ship it to GiGi so she doesn't have to wait for weeks before she gets her prize.


So how does the design evolve? I sometimes draw, but the results almost never turn out as the initial drawing. Preferable to drawing, for me, is to just start, and let it evolve from there. The designs I'm happiest with so far have been done like that. Now with stones like labradorite you have to consider an extra factor, which is the Schiller effect or the flash in the stone. You want it to be optimal when the stone is in the pendant.


Before I started this pendant I took my stone outside, sat on the grass in the shade and turned the stone around. Lucky! Beautiful flash in every direction! Which means no constrictions for the design. 


So here it is! The little leaf underneath the stone is a birch leaf, picked in spring just as they unfold. They have beautiful texture then. I usually make leaves using metal clay in spring and then they lie around on my bench until I find the perfect composition for them.